Showing posts with label Puppy. Show all posts
Tuesday, February 2, 2016
Saturday, January 23, 2016
It's Been Awhile...
It's been awhile since I have been here to visit with all of you. I thought I would stop by and say hello. This month has been crazy busy with order from the shop. I haven't had much time to do a whole lot of anything except work on those and hang with the family. I have loads of new things planned for this year. If I can get them all done it will be a miracle.
One of my favorite newer items in the shop has been a huge hit. It is Armstrong and his astro puppy Buzz.
I even had a customer that ordered one for his wife for Christmas. They were about to be the proud new parents of a sweet little boy and she wanted it for the nursery. I love orders that have a story behind them. There is a set going out next week as a Valentines gift for a little boy. The Armstrong for that order will have blonde hair though.
I hope to have a few friends for Armstrong and Buzz in the shop this year. Make sure to keep and eye out for them.
I hope all of you are having a fantastic start to this new year!
Monday, August 17, 2015
New Items Update
I can't believe I have not posted since June. It has been a busy summer around here. That has ended as of today though. My kiddo's are back at school. Mr. Boo is a big 5th grader and Lulu is a Junior this year. Yes, it is hard for me to say that. My babies are growing up WAY WAY too fast!!
I have quite a few new items up in the Etsy shop.
This is Armstrong and his astropup Buzz. They are the newest members of the Storybook Felts family. They are available separate or as a pair. Armstrong is 8" and his puppy is 5 1/2".
This is Dotty. She is a sweet bunny and loves to snuggle. She is 12 1/2 inches tall and all hand sewn so she is great even for the little ones.
And of course we can't leave out the ice queen. She is 8 1/2" and has loads of sparkle on her dress.
She even has a glitter train on the back.
There are also a bunch of foam stamps in the shop that I am getting rid of if anyone is interested. Most of them are around $2.00 or less.
I am off to get some orders out but wanted to stop by and say hi and introduce you to all these cuties. Hope all of you are having a great day and if your kiddos went back to school today I hope it was not too hectic this morning. Oh and don't forget to follow Storybook Felts on Instagram. There is a button over on the right side of the screen. I post a lot of pictures there before they hit the blog. You can also see pictures of orders and new item sneak peeks.
Monday, September 22, 2014
New Pet Sets Now Available
I added lots of new sets to the Storybook Felts Etsy shop last week. Come back each day this week to see more information about each set.
The first set I want to share with you is the new pet set that I just added. Now all of the little dolls can have their very own pet.
These sets can also be customized to match a favorite pet. All you have to do is request a color for the pet or other items and I will make a special set just for you.
Meow! This kitty cat set comes with a Kitty Cat, pet bed, food bowl, collar, ball of yarn, toy mouse and a fish.
Woof Woof!! This Puppy Dog set comes with the Dog, dog house, dog bed, collar, leash, dog bowl, ball and bone.
Come back tomorrow and see what else is new.
Thursday, February 13, 2014
How To: Make A Puppy Keychain
How To: Make A Puppy Keychain.
Over the last couple of weeks, I have been reviewing some wonderful craft books. Yesterday, I shared about making some cute keychains from
the book Happy Stitch. Today I am sharing
a little how to for a cute puppy keychain that I designed.
To make Patches the Puppy, you will need…
- The template sheet at the bottom of this post.
- Cream felt, approx. 3” x 6” (5 ½ x 15 cm)
- Tan felt, approx. 7 ½” x 8 ½” (19 x 22cm)
- Small piece of dark brown felt
- Matching sewing thread or embroidery floss (thread)
- Stuffing
- 4” (10cm) piece of brown 5/8” (15mm) ribbon
- 1 small key ring of your choice
- Needles, pins and small sharp scissors. (Embroidery or
scrapbooking scissors work great for cutting out small felt shapes.)
- Permanent markers, disappearing fabric pen or chalk to
trace pattern (Optional. You can also pin pattern to felt or just hold it
while you cut around it.)
1. Use template provided to cut out pieces.
Cut two head shapes from cream, four tan ears, one tan nose and eye patch and two dark brown eyes.
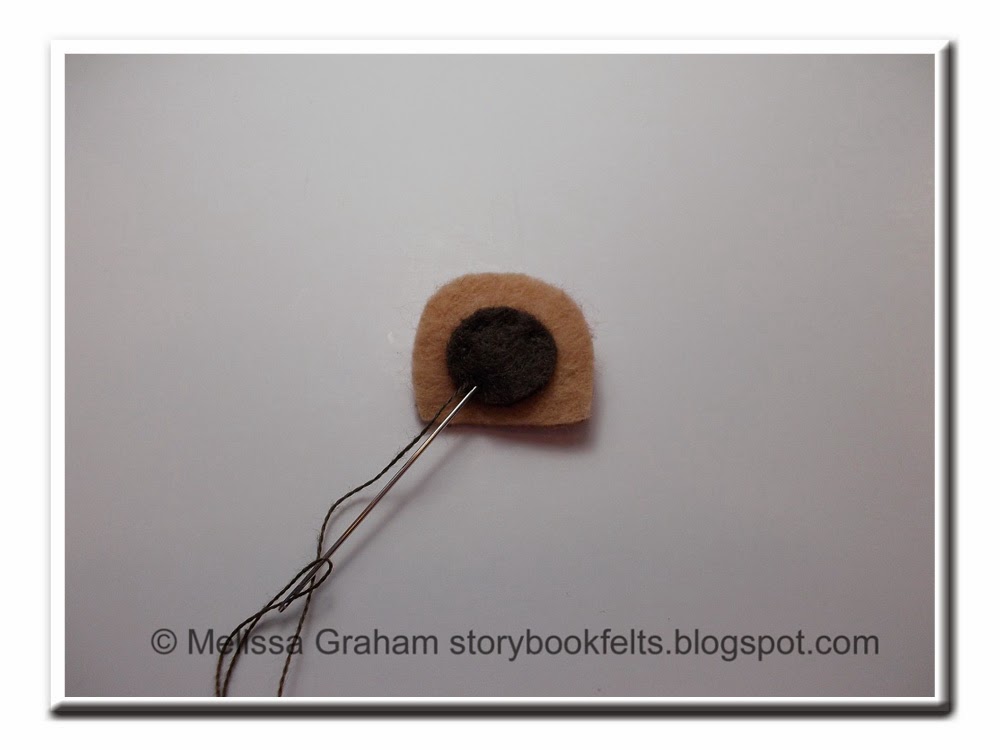
2. Sew one of the eyes onto the eye patch with a running
stitch in matching thread.
3. Sew nose, eye patch and other eye in position with a
running stitch in matching thread.
4. Embroider mouth under nose with a backstitch in dark
thread.
5. Sandwich two of the ear pieces together, then stitch
together with a running stitch in matching thread.
Repeat with other two ear pieces. If you need to, trim around edges to make sure they have a clean edge and match up well.
6. Loop ribbon through key ring. You can use a small piece
of tape to hold the ribbon ends together if needed.
7. Sandwich the two head pieces together and place the end
of the ribbon between them. Leave approx. 1” (2.5cm) of ribbon sticking out.
Pin in place.
Now slip ears between the head pieces and pin in place.
Sew ¾ of the way around, through all
thicknesses, with a running stitch in color to match head. Remove pins as you
go.
8. Stuff head and sew the remainder of head together.
Now add keys or attach to your favorite child’s backpack.
You can also make it in any color you want. The one above was made to match my son's favorite snuggle buddy.
Click Here to view template in another window and print at 100%
This tutorial is for non commercial use only: you can use it to make as many felt puppies as you want for yourself or as gifts, but please don't make any for sale. You may borrow a photo or two if you want to blog about this project, but remember to credit me and link back to my original post, and do not reproduce my entire tutorial on your site. Thanks!
Subscribe to:
Posts (Atom)